Start with the operational question
Combine soil survey information, terrain, crop history, and repeated observations of growth variability. Test whether the proposed zones persist across more than one crop cycle.
Separate observation from explanation
Clustering one image into colours can reproduce a temporary irrigation event or harvest pattern rather than stable soil differences. Zone boundaries require field interpretation.
Create zones that can be checked and managed
A management zone is a hypothesis about meaningful spatial differences, not simply a colour produced by a clustering tool. Start with independent evidence such as soil descriptions, terrain, management history, and repeated crop observations. Identify which differences seem persistent and which are explained by a recent event. Retain the input layers so that an agronomist can understand why a boundary was proposed.
Test the candidate zones with a sampling design that covers their interiors, transitions, and contrasting conditions. Record whether a sample represents a point, a small plot, or a larger management unit. The scale of the observation affects how confidently it can describe the surrounding zone. If a proposed zone contains several unrelated conditions, refine the hypothesis instead of forcing them into one label.
Before adoption, compare the zone size with the practical unit of work. A treatment area must fit the equipment, labour, access, and approval process available to the farm. Preserve candidate and approved zones as separate versions. The approved record should explain the evidence used, the uncertainty remaining, the responsible reviewer, and the circumstances in which the zone will be reassessed.
Read article: Sugarcane machinery traffic and compaction investigation
Build the cane calendar before comparing fields
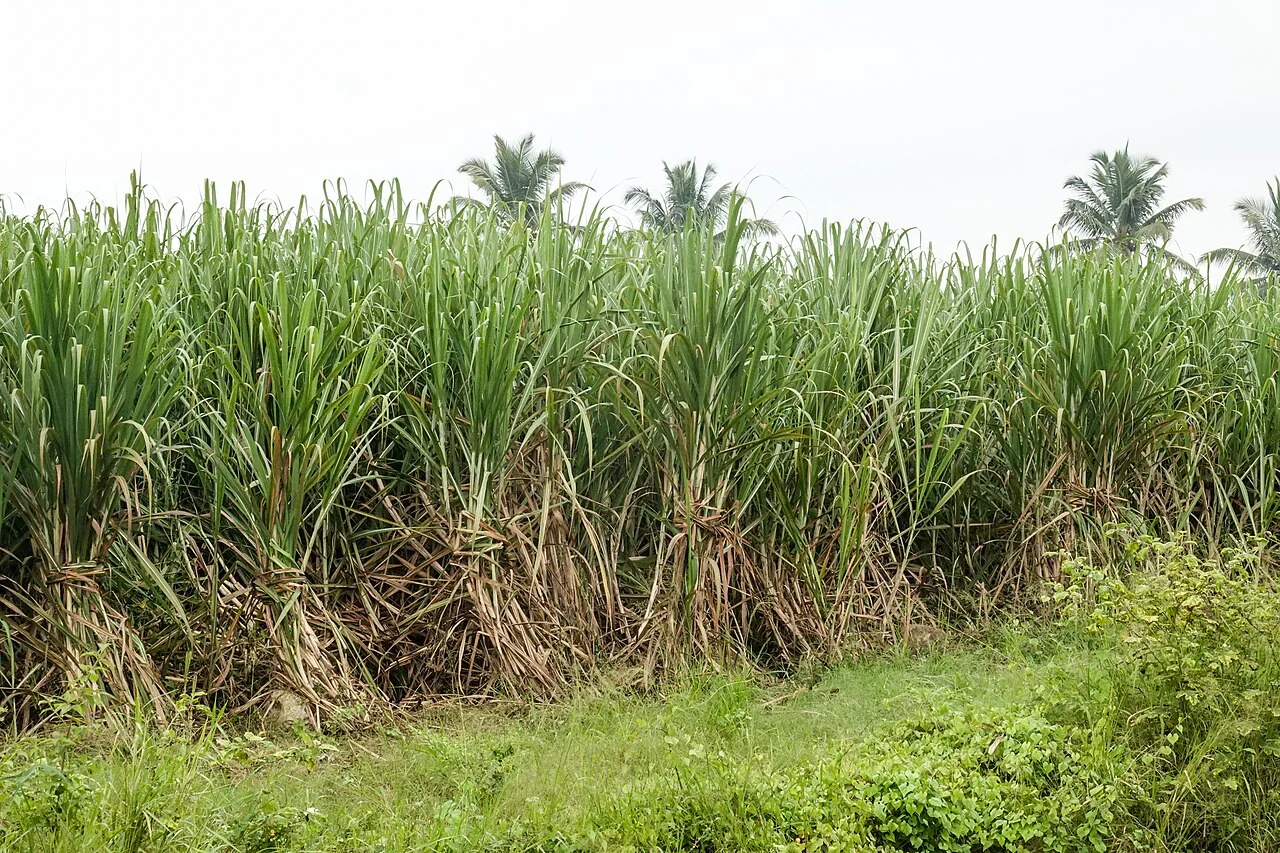
A sugarcane monitoring programme needs more than a commodity label. Distinguish plant cane from ratoon cane, record the planting or last cutting date, and keep the ratoon sequence where it is known. Variety and the intended harvest window also belong in the field register. Two fields observed on the same date may be at very different development stages. Comparing their canopy values without that history can turn normal age differences into a misleading list of weak fields.
Follow establishment, tillering, canopy development and the approach to harvest as separate operational periods. Image dates should be linked to events such as cutting, irrigation, gap filling and major weather disturbances. Keep the actual observation date when a visit happens later than planned. For a ratoon field, regrowth starts from the preceding crop's stubble; therefore the cutting record is a more useful starting point than the original planting date alone.
Turn uneven regrowth into a field question
An uneven patch after cutting can justify checking stubble condition, missing stools, water distribution, traffic damage or weeds. Map the patch as a candidate for investigation and walk both the affected and apparently normal sections of the same field. Count or assess stands using a documented sampling unit so the comparison is repeatable. Photograph the ground as well as the canopy, because retained trash or exposed soil can explain part of the overhead appearance.
TNAU's ratoon guidance emphasises timely operations, suitable varieties, crop population, irrigation and crop protection. These are useful categories for a monitoring form, but local recommendations should determine the actual action. A satellite value cannot specify a universal irrigation interval, fertiliser rate or plant-protection treatment. Before proposing an intervention, connect the mapped pattern to the field's soil, water access, crop stage and management history. The same image pattern may require different responses in different fields.
Separate canopy growth from harvest quality
A vigorous canopy is not a direct laboratory measurement of sucrose, recoverable sugar or mill quality. Harvest planning should combine field maturity observations and the relevant quality tests with transport access and mill scheduling. Keep those measured attributes in separate columns from vegetation indicators. If a predictive model is tested, validate it against representative local measurements and hold back independent fields or seasons for evaluation. A good fit to the development data does not establish reliable performance elsewhere.
After heavy rain or a harvest operation, revisit access routes and damaged areas before assuming that a change is a crop-health response. Lodged cane, wheel tracks, recent cutting and waterlogged ground can all complicate the scene. End each monitoring cycle with a short field-specific action record: the question raised, the evidence collected, the responsible person and the next review date. That record helps the team judge whether the monitoring led to a useful decision rather than simply producing another colour map.
Design reference observations that represent the field
State the population that the sample should represent and the question it must answer. Select locations across relevant crop stages, terrain, management, and image conditions. Include ordinary areas and difficult cases, not only conspicuous anomalies or convenient roadside stops. Record selection rules so that later users understand where the reference is representative.
Define the observation unit, area or depth, timing, instrument or laboratory method, and required replicates using the appropriate discipline's protocol. A point observation and a satellite pixel have different spatial support. Record enough context to evaluate that mismatch. Keep inaccessible sites in the sampling log and explain any replacement rather than silently dropping them.
Separate reference collection from the result being evaluated when feasible. Review observer consistency and missing data before calculating agreement or error. Retain raw observations, corrections, and exclusions with their reasons. More samples can improve precision, but a large biased sample still fails to represent excluded conditions. Use the results within the population and period that the sampling design supports.
Read article: Sugarcane lodging assessment after storms
Check the support behind every mapped value
Inspect the source over the actual field of interest. Scene-wide metadata can conceal a cloud, shadow, blurred strip, incomplete survey, or alignment problem exactly where the decision is needed. Record the date, spatial support, quality flags, and valid coverage for each field. An observation with little usable support should remain unavailable rather than being filled with an apparently plausible value.
Review missing values and exclusions separately from valid measurements. A zero, an unvisited location, a masked pixel, and a sensor error describe different circumstances. Preserve the reason for missing data through the summary stage. If an estimated value is used, mark it as estimated and explain the method so that it cannot be mistaken for an independent observation.
Choose acceptance rules before comparing outcomes. Apply them consistently to favourable and unfavourable results. Retain a small collection of difficult examples and revisit it after processing changes. Quality review should include omissions and inaccessible areas as well as the records that were successfully produced. A transparent incomplete dataset is more useful than an apparently complete map whose unsupported values cannot be identified.
Define the deliverable and approval
Deliver a zone hypothesis map and a stratified soil-sampling plan, with laboratory results and agronomic decisions kept separate from the image-based starting hypothesis.
A practical review before sharing the result
Check the observation against its source and make sure the field identifier is correct. Review dates, units, missing values, quality exclusions, and geometry versions. Ask a colleague to reproduce one representative result from the recorded inputs. This small independent check often exposes a misunderstood field code or a processing assumption before it affects an entire report.
Write down the alternative explanations for the mapped pattern and identify what evidence would distinguish them. Keep a measured observation separate from the interpretation and from any treatment or management instruction. A decision should name its responsible reviewer and account for local operating procedures. If the evidence is insufficient, the appropriate output is a targeted inspection rather than a confident claim.
Keep the original result, any reviewed version, and a short change log. State which locations and periods the output can reasonably describe. When sharing a map, provide a clear legend, source dates, and an accessible explanation of uncertainty. The recipient should know whether a feature is a confirmed observation, a candidate awaiting inspection, or a model-based estimate.
Read article: Sugarcane crop-residue and soil-cover mapping
Turn the investigation into a repeatable field cycle
Prepare the visit with a map that can be used at the intended location and a concise list of questions. Confirm access, permissions, equipment, and the availability of a person familiar with the field. Choose representative stops as well as unusual areas. Record where the planned route could not be followed, because missing observations can change how the result should be interpreted.
After the visit, review the observations while the team can still clarify them. Connect photographs, measurements, and comments to the same field and visit identifiers. Assign a follow-up status and preserve unresolved cases. A correction should explain what changed and why; it should not erase the original evidence or make an earlier interpretation appear to have been certain.
At the next suitable observation date, compare conditions using the same definitions and review any management or weather events that occurred between visits. Record the action actually completed and its operational outcome. This creates an evidence trail from an initial pattern to field confirmation and later review, making the mapping process easier to improve over successive seasons.
Connect this work with AgroSensing
Use a connected spatial workflow to organise imagery, commodity records, and geolocated field observations. Discuss the appropriate data, validation, and operating scope with the team.
Sources and further reading
The linked primary references explain the underlying agronomic and geospatial concepts. The field workflows in this guide are editorial recommendations to adapt with the responsible local specialist.